Activating licenses advanced
After the successful license server installation and registration, you need to provide the licenses to the license server that it is to serve. Advanced license activation is used to activate available licenses to a specific license server.
About this task
You use the Advantest License Portal to map the licenses to your license server.
Before you begin
You need to have a login to the Advantest License Portal. If you are not able to login, get in contact with your Advantest representative.
Procedure
- Select the license server on which the licenses are to be activated.
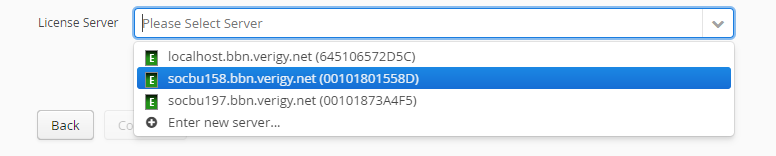
 - FNE license server
 - FNP license server
5. Click Continue.
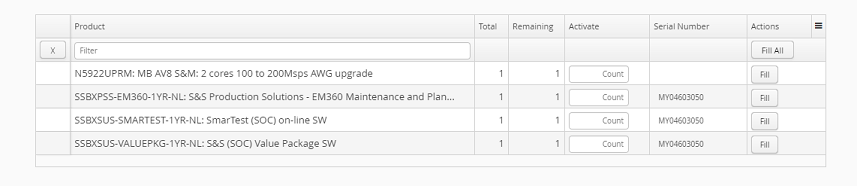
The license table is displayed, listing the licenses available for activation on the selected license server.
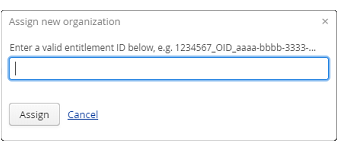
Note: If the entitlement ID is not available in the selection list, you can add the organization by selecting: Entitlement not listed.., entering the entitlement ID, and clicking Assign. The organization of the entered entitlement ID is assigned to your user setup and enables you to work on the licenses of that organization.
6. Enter the data for the licenses you want to activate. For example, the count value (number of licenses that you want to activate) and any other mandatory license information.
Click Fill to enter the remaining count to the Activate field of the associated license. Fill all enters the remaining count of all licenses in the Activate field.
Note: Filter the list of licenses using a text string in the Filter field (clear with the X button). Click a column header to order the entries. Customize the page from the drop-down menu.
7. Click Continue.
The Verify the selection section is displayed.
8. Review the license summary.
If you want to change any values, click Back to reopen the License page.
Note: To cancel the license activation request, click a tab (License Management or Portal Home).
You can only correct mistakes after activation if you are working with a FlexNet Embedded license server. Changes cannot be made on FlexNet Publisher license servers.
9. When you are sure that the information has been entered correctly, click Generate Licenses.
Results
The licenses are generated and the License Activation Result page is displayed, from which the following options are available:
- Download license - Download the license file for the newly generated licenses. If you still need to activate further licenses on the same license server, download the license file after completing all activations.
- Proceed with Simple Activation Enables you to activate the next license from the entitlement ID.
- Navigate to the Overview Page - Opens the License Management start page.
What to do next
sync-fne-server action on the license server for immediate usage or wait for the next automatic server synchronization.Note: The automatic server synchronization is executed every 12 hours.
Alternatively, you can use the FNE Server viewer to activate the synchronization of the licensing server.
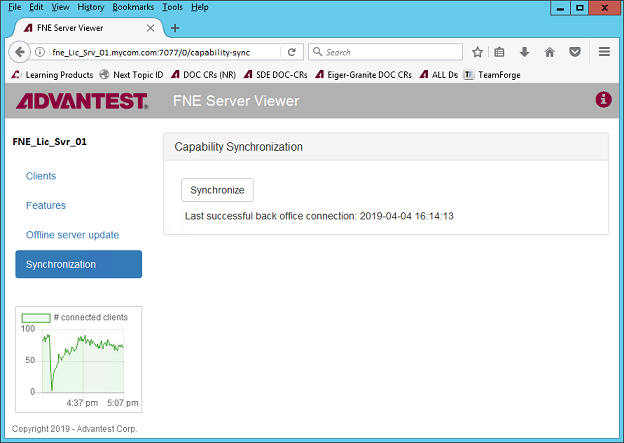
Note: If the FlexNet Embedded license server is not connected to the internet, you must download the license container file and upload it to the FlexNet Embedded license server.